You are here: Foswiki>Applications Web>HowToMain>AppHowToGitUploadExistingProject (10 Jan 2024, MichaelKelnhofer)Edit Attach
Git upload an existing project
Please make sure to read AppHowToGitInEclipseForBeginners at least up to and including 2.1. We will create a project in our personal git organisation which can later be move to one of the bigger organisations like fcc-applications or fcc-commons.
Create the gitea project
Visit https://git.acc.gsi.de/ and Please follow the screenshots.1. Chose new repository from the "+" menu
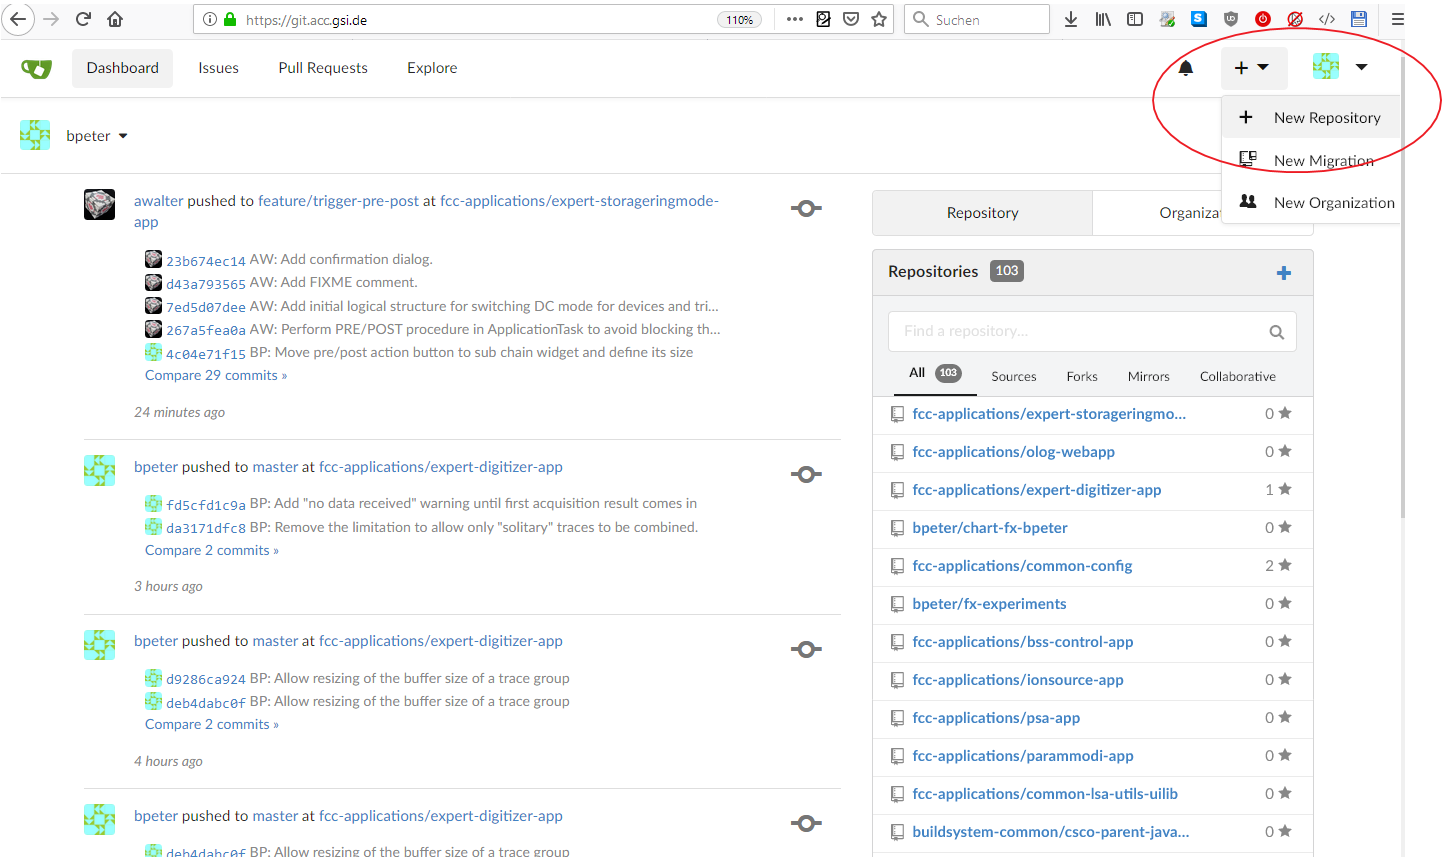
2. Enter you project name and information
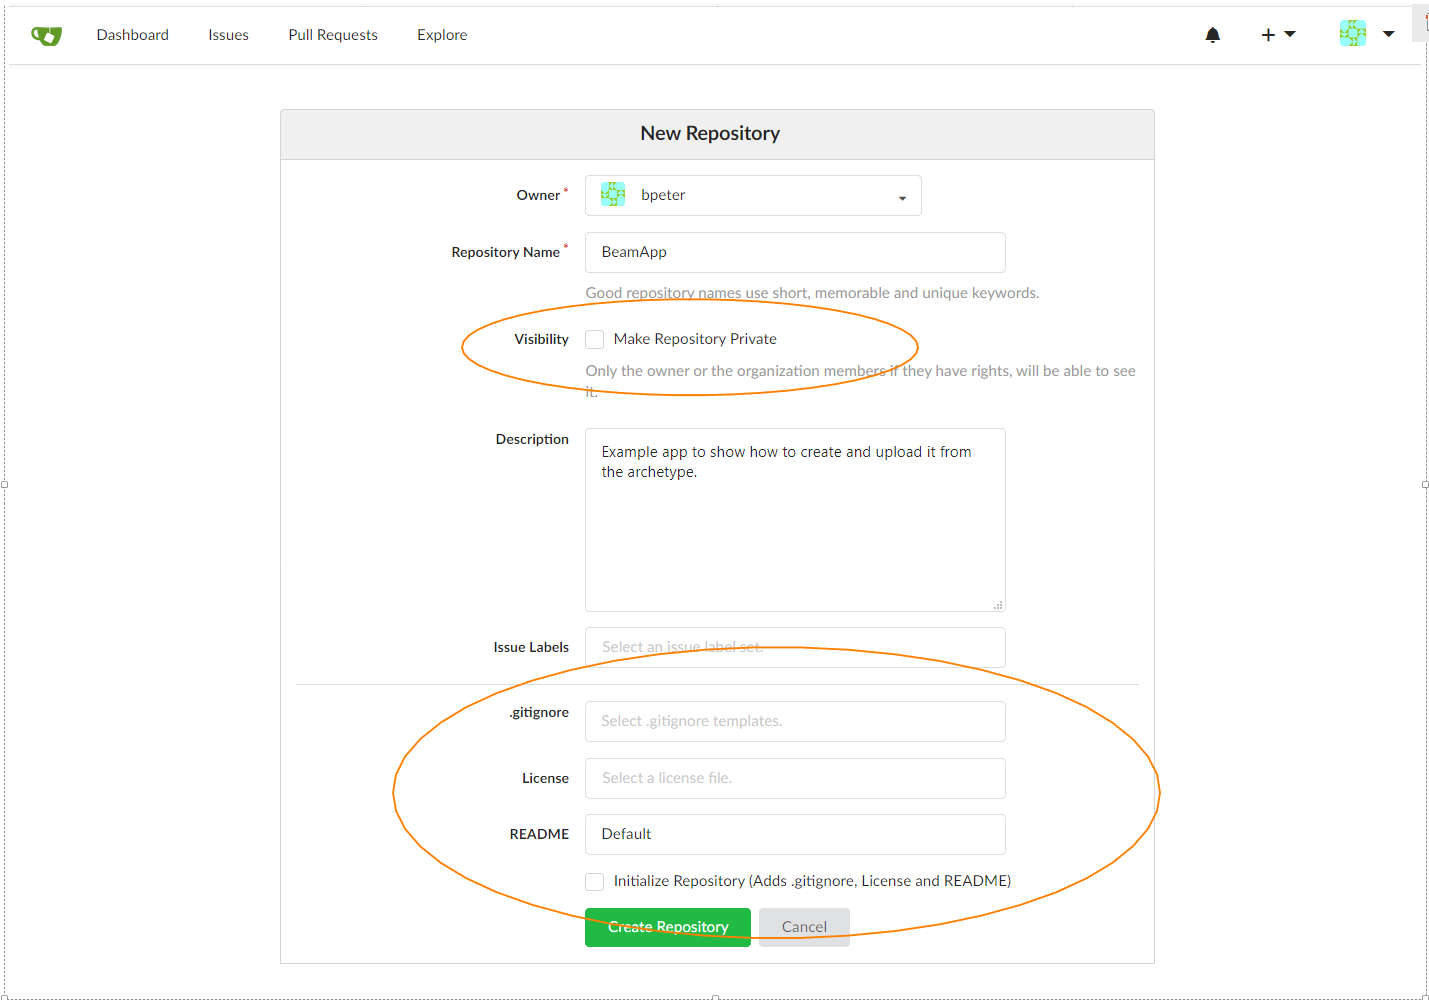
- Owner: You name
- Chose a repository name that resembles or even is the same as the maven artifact name
- Private repository is only if you want to hide the project, none of your collegues will be able to see the project
- Leave the gitignore, license and especially the "initialize repository" option empty. We already have code that we want to upload and don't want do get any conflict
- Hit "Create Repository"
3. Repository created, copy URL
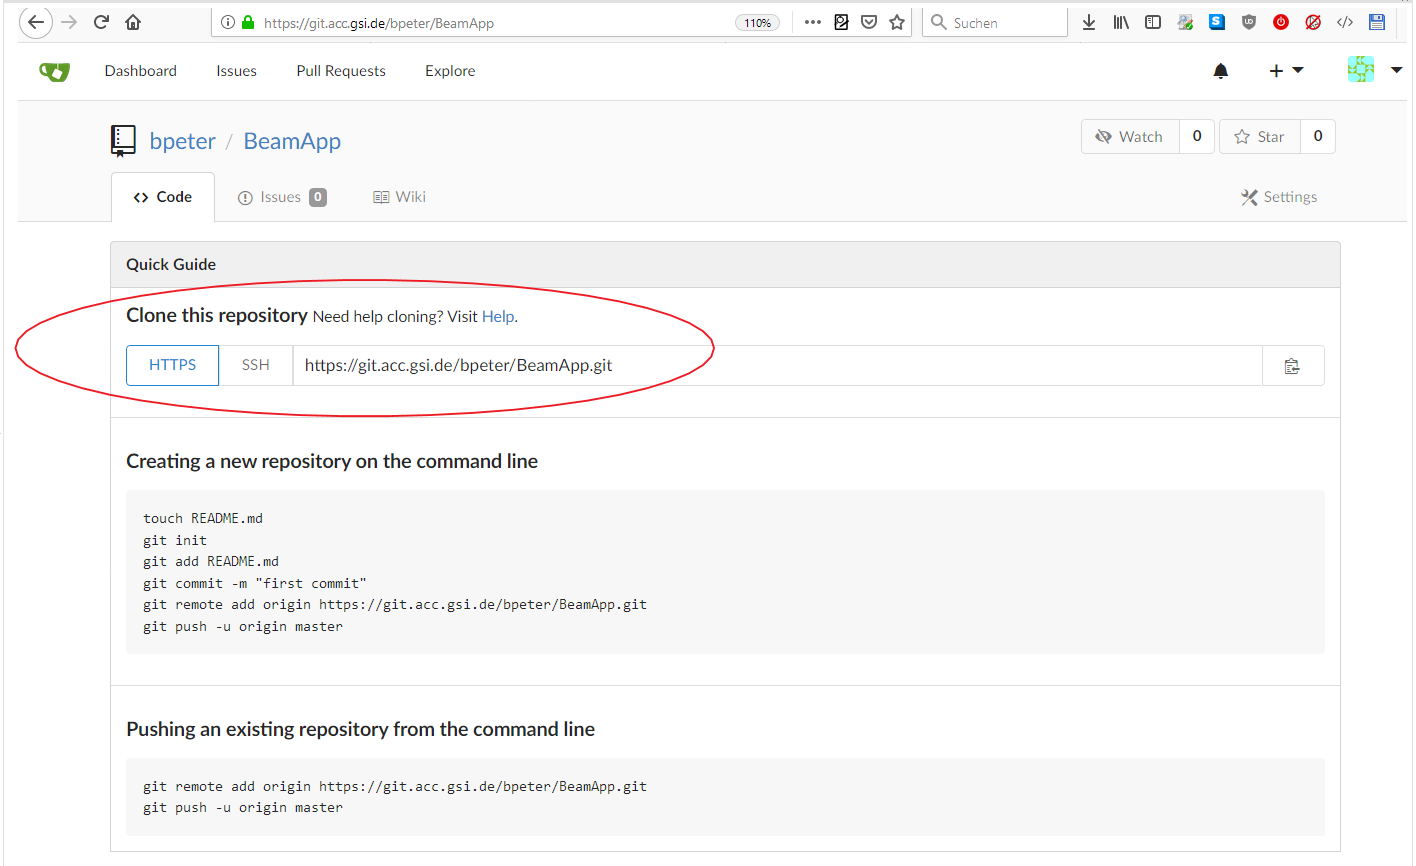
- Repository created successfully - make sure to copy the marked http repository URL.
4. Initialize the local git repository
Now we have to do some command line work. Open a bash shell and navigate to the source files of your project. (To get the path, in Eclipse: selectProject -> Properties -> Location might help you)
Enter the following commands from the main project directory (were pom.xml is)
cd DIRECTORY_OF_THE_PROJECT
git init
# download a default gitignore file that will prevent eclipse project files from being uploaded
wget https://git.acc.gsi.de/buildsystem-common/csco-java-fx-template/raw/branch/main/.gitignore
# Adjust the complete URL to the previously copied one
git remote add origin https://git.acc.gsi.de/REPLACE_COMPLETE_WITH_THE_URL_YOU_HAVE_COPIED_BEFORE
# Add and commit all these changes with the following commands
git add -A
git commit -m 'Initial commit'
# We will then push the changes using eclipse in the next step
5. Push the repository using eclipse
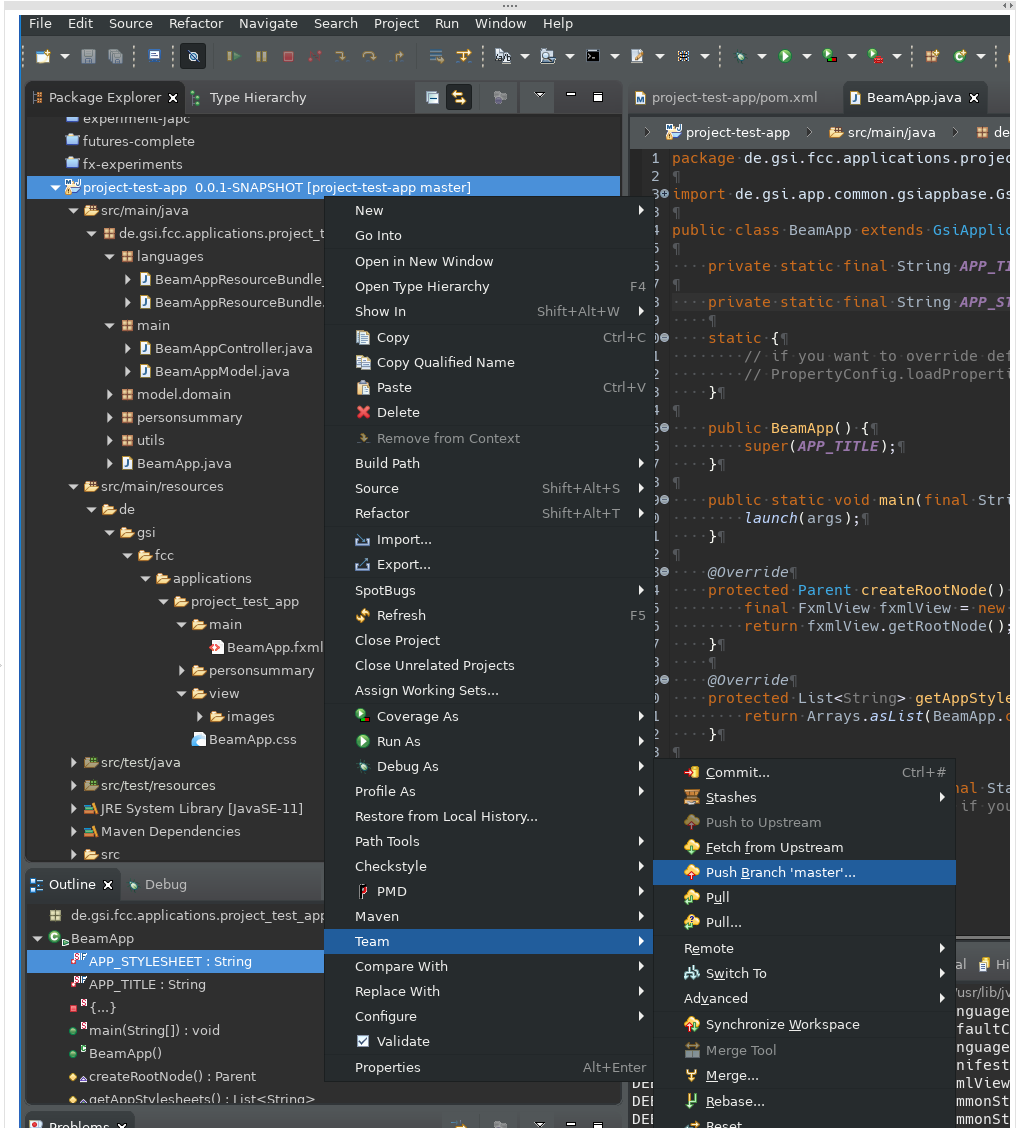
- Now we switch back to eclipse, select our project in the repository explorer and do a
"-> refresh"or hitF5while the project is selected - Select
Team -> Push Branch "master"...- (highlighted blue in the screenshot below)
- if you only have the options "Apply patch", "Share Project", and "Share Projects", choose "Share Project", select GIT and finish, repeate step 2
- There might be a prompt for your local
keystorepassword, enter it or cancel thekeystoredialog - Click on
PreviewandPushin the following dialog pages
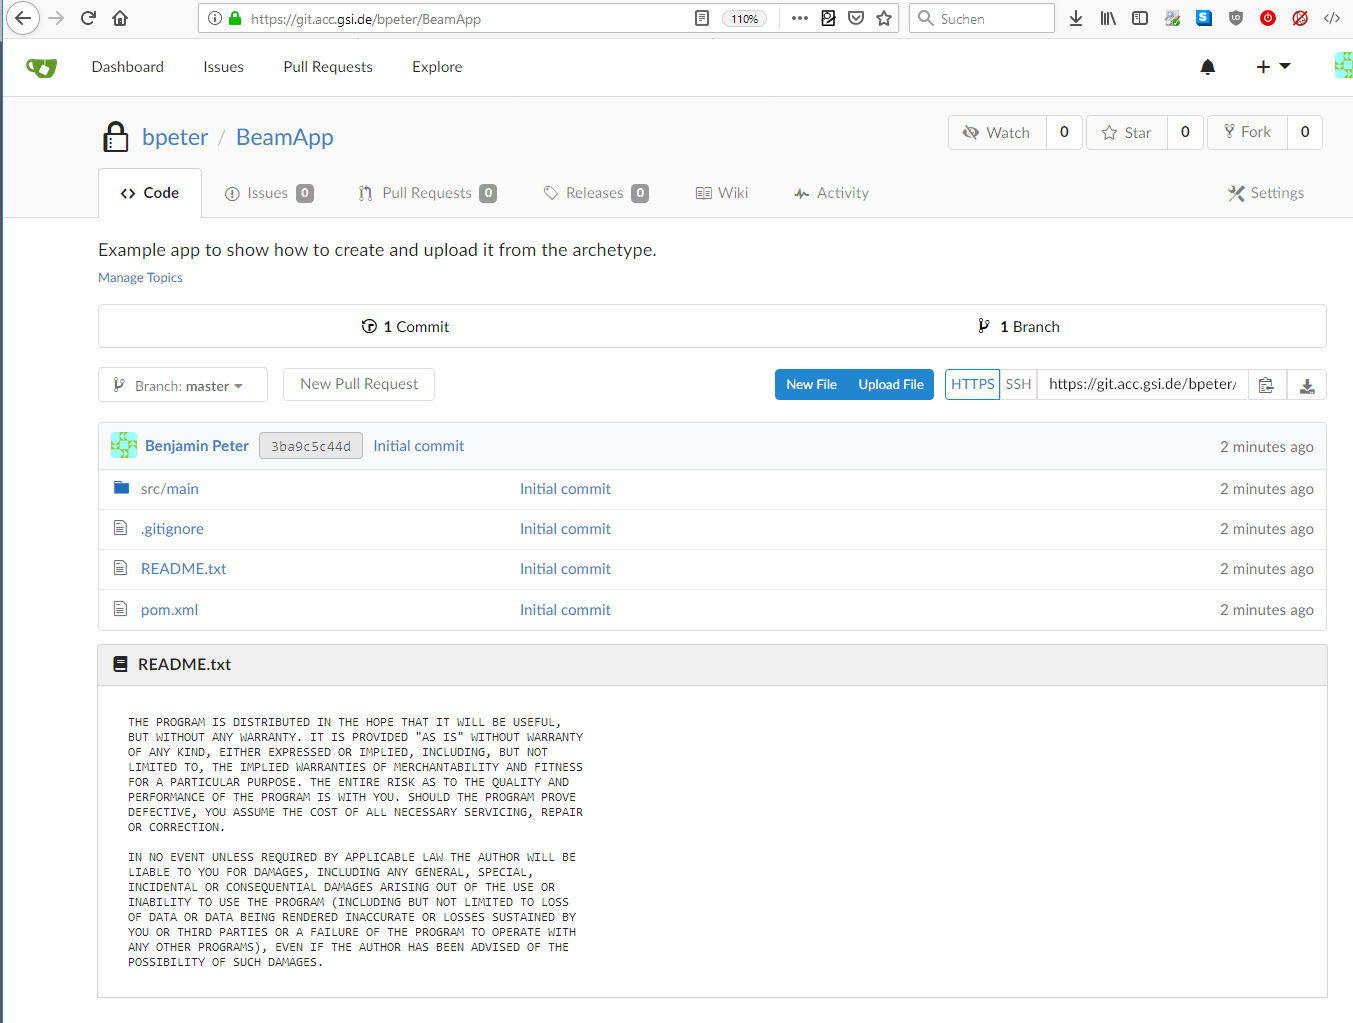
6. Success
You can see an entry in your eclipse "history" view now and if you refresh you gitea project page.
| I | Attachment | Action | Size | Date | Who | Comment |
|---|---|---|---|---|---|---|
| |
01-new-repo.png | manage | 155 K | 28 Jan 2020 - 16:21 | BenjaminPeter | |
| |
02-new-repo-settings.png | manage | 76 K | 28 Jan 2020 - 16:21 | BenjaminPeter | |
| |
03-new-repo-success.png | manage | 71 K | 28 Jan 2020 - 16:21 | BenjaminPeter | |
| |
04-push-branch-mater.png | manage | 219 K | 28 Jan 2020 - 16:21 | BenjaminPeter | |
| |
05-success-history.png | manage | 72 K | 28 Jan 2020 - 16:21 | BenjaminPeter | |
| |
06-success-gitea.png | manage | 99 K | 28 Jan 2020 - 16:21 | BenjaminPeter |
Edit | Attach | Print version | History: r8 < r7 < r6 < r5 | Backlinks | View wiki text | Edit wiki text | More topic actions
Topic revision: r8 - 10 Jan 2024, MichaelKelnhofer
 Copyright © by the contributing authors. All material on this collaboration platform is the property of the contributing authors.
 Ideas, requests, problems regarding Foswiki? Send feedback


